Wednesday, 28 September 2011

Autumn Candle


Hello! My card today is for the Mix it up Monday Challenge over at STV, the very talented Tammi Mayberry set a challenge to use the following picture for inspiration to create a card.


As you can see I have used the colours, the jars and the leaves and flowers to create my project.


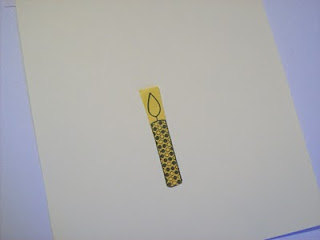
First I stamped the candle from a SU set called - Party this way, on Very Vanilla card stock.


I then stamped it again on a post it and cut it out, and masked my candle.


Next I stamped the jar from Buds & Vases on to my Stamp-a-ma-jig, (these are also available at SU).


I then positioned the jar where I wanted it, and stamped over the masked candle.


I coloured the candle with Copic markers, RV17, YR23 & Y02.


And I coloured the jar with B000 & B00


I cut out and embossed the image using my Nestabilities Petite Ovals small.


While it was still in the die, I sponged SU Tempting Turquoise.


I then added red and gold rhinestones to the bottom of the jar to represent the pebbles in the original picture.


This is the result!


Next I cut out three small leaves from my new Heartfelt leaves die by Spellbinders 


Then I inked them up with the Distress inks in the same way as yesterdays tutorial.


I stamped the boarder from A Year of Boarders in SU Tangerine Tango


The card is all SU, the base is Tangerine Tango, I layered this with some Very Vanilla and then some Tempting turquoise which I embossed with my Swiss Dots embossing folder.
The greeting is from The Falling for you STV Kit, and is cut out with my SU 1 3/4 " oval punch and layered on more Tempting Turquoise that has been cut out with my SU 2" oval punch. This is then layered on to the stamped strip and layered on to more Tangerine Tango.

All stamp sets, unless otherwise stated are from Gina K Designs

Card and ink is all from Stamping Up

Thank you for stopping by!


Tuesday, 27 September 2011

Tattered Leaves Wreath

Happy Tuesday to you


I though you might like a tutorial on a project I have made for a display at Hobbycraft in Broadstairs.


Firstly I cut out several leaves, using vanilla card stock and my Cuttlebug.


Next I used a bone folder and a pricking mat, to free-hand emboss veins on the leaves


This is a picture of one of the leaves after embossing.


I then chose a selection of Distress inks in the following colours:

Dusty Concord, Forest Moss, Rusty Hinge, Fired Brick, Victorian Velvet, Mustard Seed and Crushed Olive. As you can see I used sponge daubers for this project as the leaves were small, but you can use the Tim Holtz / Ranger foam applicators for the same result.


Next I randomly added colour to the leaves using the sponge daubers and the distress inks.


I continues to add random colours from my original selection.


Blending as I went along.


Until all the leaves were coloured.


I then made two bows using complimentary ribbon, using my Bow Easy, the ribbon and wreath are available at Hobbycraft stores across the country.


I added some twine to make a hanger for the wreath and then used a hot glue gun to attach the ribbon.


I then attached the leaves in the same way.

Thank you for stopping by, happy crafting.


Monday, 26 September 2011

This weeks STV challenge

Hi,
Sorry it has been a while, we have been a poorly family for the last couple of weeks, but I am the only one left who is still unwell  (I have an abscess on my tooth). Illness does not deter me from crafting, and I thought I would share with you a couple of this weeks challenge cards.

First is the "Mix it up Monday" Coloured pencil magic challenge, this is a technique I have not come across before and I am very pleased with the results. The technique is to stamp an image, usually a solid image (although if you look through the Gallery on STV you will find some finer stamps have been used) with white ink on a dark background and when the ink is dry colour your image with pencils, easy huh! so here is my attempt at this technique.


I used SU Craft Whisper White and KOH-I-NOOR Polycolor pencils, but any colouring pencils will do, although I think water based pencils would not give such a vibrant result, but you would just have to give it a go to see! The stamp set is called Garden Silhouettes

The second challenge was to CASE the wonderful Deb Felts, she has a brilliant blog With a Stamp and a Song

The card I cased is 


My version of this (remembering the challenge was to change at least two things about the card) is below


I used Holly Jolly Christmas by Echo Park DP  , and the stamp sets are Falling for you STV Kit where I coloured the bird using the Highlighting with Copic markers technique, the video for this can be seen below. The greeting is from Holiday Greetings both available at Gina K Designs.


Thank you for stopping by.

Saturday, 10 September 2011

Stamp TV Challenges 5th & 9th of September 2011


This card is for a very talented designer over at STV, she has been diagnosed with breast cancer, which I know she will beat, it is also her birthday so the challenge was to make a card in pink to represent the breast cancer awareness campaign and also combine it with a birthday card for AJ.

I used the STV stamp set Vintage Chic, for the main image and cut it out on my Cuttlebug using Nestabilities Labels four and labels four small. The birthday greeting is Fanciful Tags and is cut out using a SU labels punch. The scroll work around the greeting is an EK Success medium wave flourish punch. The ribbon is also from SU.

My second challenge card this week is a sympathy card for the "Free for All Friday" Challenge


The stamp set used here is called Hope Grows by Theresa Momber, and the ink is Memento Grape Jelly and Lulu Lavender. The Nestabilities are Classic ovals large and small, with the sentiment cut out with Fancy Tags two.
I kept the card simple as it is a sympathy card.

All stamp sets can be purchased exclusively at http://www.shop.ginakdesigns.com/main.sc

Thank you for stopping by x